

How To Use The Width Tool In Illustrator

Introduction to Width Tool in Illustrator
Adobe Illustrator is one of the most famous and powerful programs used and developed for graphic editors and designers. Most of the 2D editors generally use Adobe Illustrator as it has a vast variety of tools and functions with lots of effects that can be created either manually or comes by default in the software. Adobe Illustrator is mostly used for creating 2D Artworks and Graphics. With this program, the Width Tool in Illustrator has become way too easy to create any logo designs, web pages, advertising materials, or even 3D effects. Every tool in the program has its unique function, and each tool is as important as the other. Some tools may not seem to be in use each and every time, but still, they hold weight and advantage to the software.
One such tool in Adobe Illustrator is the Width tool in Illustrator. This tool can be used for multiple reasons and may sometimes be missed by any user because of its low popularity amongst graphic designers. With the Width tool, any design can be molded and modified by just creating a stroke. The width tool lets the user work smarter rather than harder manually.
How to Use the Width Tool?
In the following examples, we will understand how to create a variable-width stroke profile and use it on other objects for making manual work easier and simpler.
Step 1: Open a New File in Illustrator.
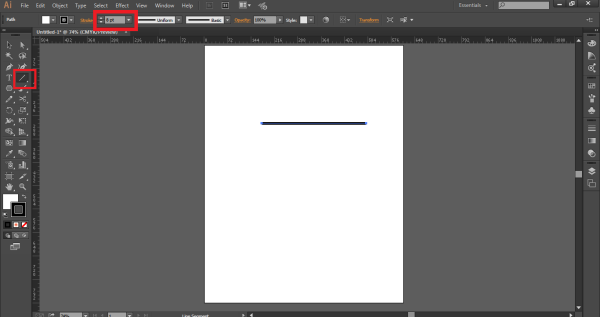
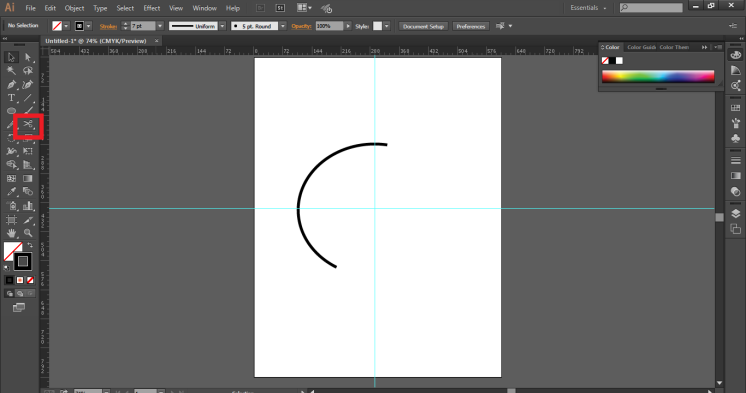
Step 2: Draw a Stroke using the line segment tool. Increase the width of the stroke.
Step 3: Use the Width tool or press the SHIFT + W command to activate the width tool.
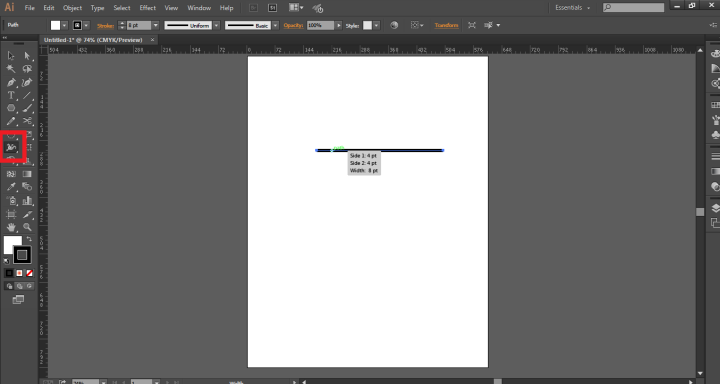
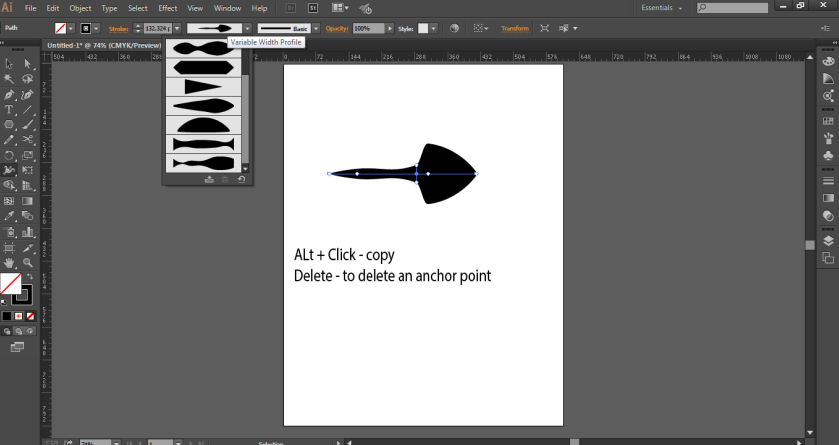
Step 4: Click, hold the mouse and drag on the stroke to create anchor points according to the design you want to create.

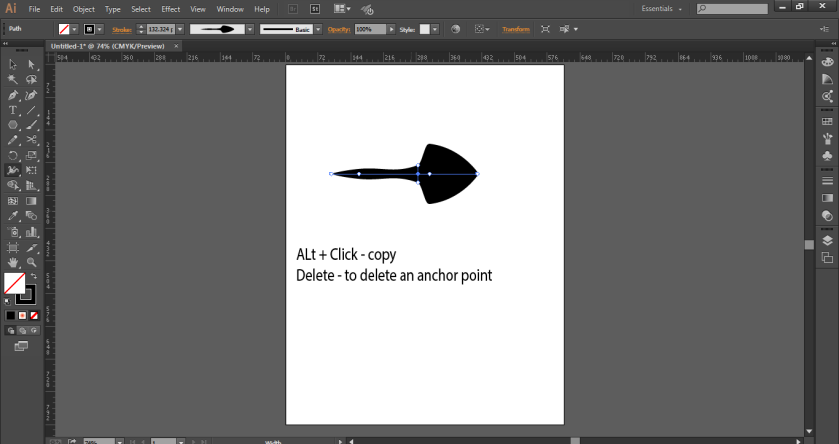
Step 5: These anchor points help in creating a specified shape or object by just using the Width tool.
Step 6: We can also copy the anchor points by using the ALT + click command and delete these anchor points by selecting any point and using the DELETE command.
Step 7: When the shape is created, go to the Options bar and click on Variable Width Profile.
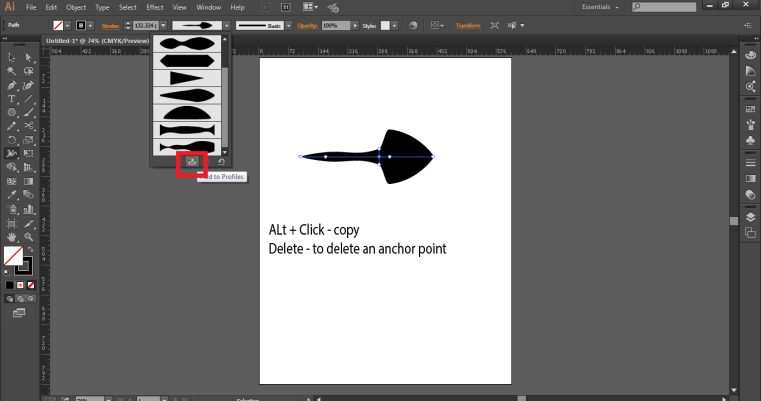
Step 8: Select the ADD TO PROFILES as shown in the image; this will add the shape created to the Variable Width Profile. These variables are very useful as they can be used at any point in time just by clicking on them.
Using Variables with our Objects or Shapes
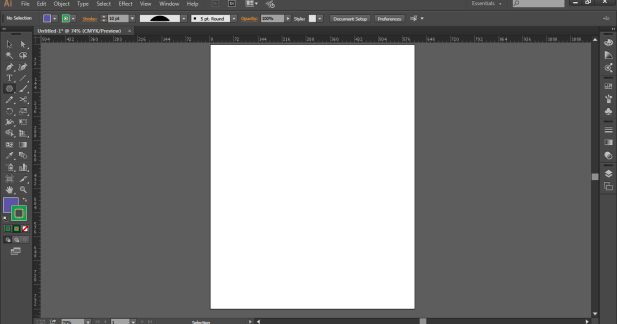
Step 1: Create a New file in Illustrator.
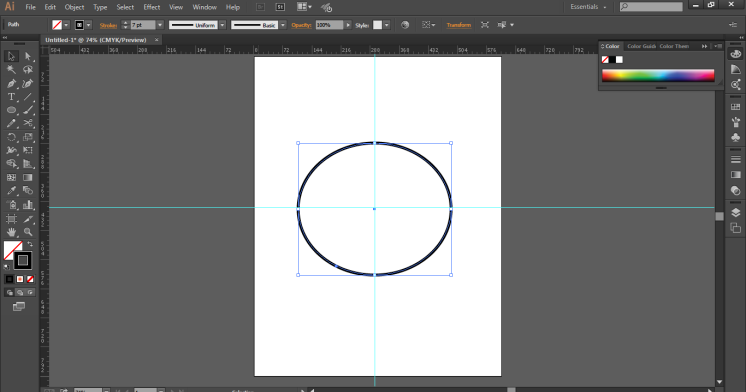
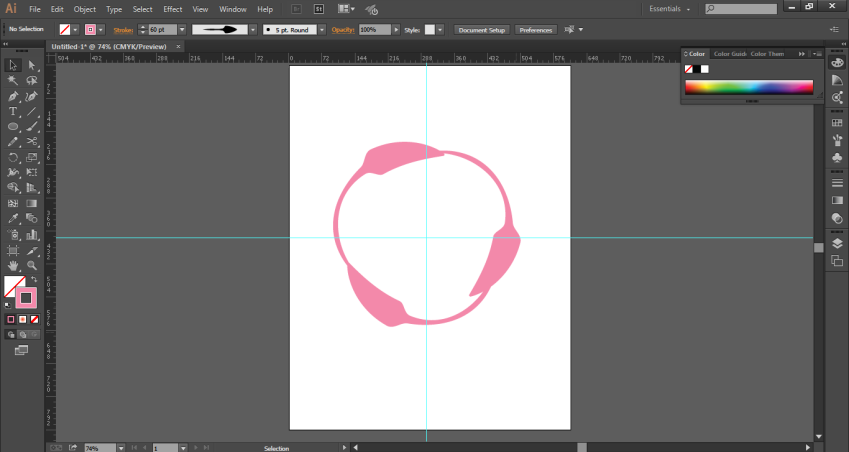
Step 2: Draw a circle using the ellipse tool.
Step 3: Use the scissor tool, and cut the circle as shown in the image.
Step 4: Now, change the color of the stroke to pink and use the stroke that was saved earlier from the Variable Profile menu. Also, increase the stroke weight of the shape.

Step 5: Now, make a copy of the shape as shown in the image.
Step 6: This is how we can use the width variables on any object in any way.
- These variable profiles depend on the width size, so the user must increase or decrease the width weight to achieve the desired effects. These variable profiles can be modified anytime and with any number of times.
- We can change the stroke weight, color gradient or opacity of the same. In a deeper way, we can say that these width profiles are not just instances but also the storage to vector data that contains details of width points within a stroke path. Moreover, these width profiles can be applied to any path or curve or shape, irrespective of its dimensions and size. The width tool is a very efficient and useful tool to use for urgent projects and presentations, as it can be a quick way to create an object or a shape without going much into detail and in process.
- When we use the width tool, we should always use the shape tool or the pen tool to avoid getting too many anchor points or a wavy path. The pen tool helps the user to give a better outlook and show a better workflow. While most of the designers who are generally into freehand drawing and use the pen tool for most of their work should use the Width tool for creating quick effects. It is also necessary to understand that the Width tool doesn't work with the Brush tool in general. Since the width tool is based on creating paths on a stroke, it doesn't work on the brushes, and the brush tool automatically gets disabled when the width tool is in use.
Conclusion
The width tool is an important and capable tool for quick and easy effects and results. The user working with shapes and pen tool can be at an advantage to use this tool and use the benefits of this great but hidden tool. The user should remember that they cannot use the Brush tool simultaneously with the use of the Width tool. The work becomes easy and efficient, while the strokes can be changed at any point in time, and this is the most important part of the Width tool.
Recommended Articles
This is a guide to the Width Tool in Illustrator. Here we discuss how to use the Width tool and how to use variables with objects or shapes. You can also go through our given articles to learn more-
- After Effects Tools
- Adobe Illustrator for Students
- Effects in Illustrator
- Smooth Tool in Illustrator
How To Use The Width Tool In Illustrator
Source: https://www.educba.com/width-tool-in-illustrator/
Posted by: higginbothamfacking.blogspot.com
0 Response to "How To Use The Width Tool In Illustrator"
Post a Comment